ModDevGradle

请在 NeoForged 项目列表中查看最新版本。
如果你要升级到插件的新大版本,请参阅破坏性变更列表。
特性
- 采用最新的 Gradle 最佳实践,并兼容 Gradle 8.8
- 生成编译 NeoForge Minecraft Mod 所需的构件
- 可从 Gradle 或 IntelliJ 启动游戏,用于调试与测试
- 自动创建并使用便于开发的日志配置,用于测试 Mod
- 支持 Gradle 配置缓存,加速 Gradle 任务的重复运行
NeoForge Mod 基础用法
在 gradle.properties 中:
# Enable Gradle configuration cache if you'd like:
org.gradle.configuration-cache=true
在 settings.gradle 中:
plugins {
    // This plugin allows Gradle to automatically download arbitrary versions of Java for you
    id 'org.gradle.toolchains.foojay-resolver-convention' version '0.8.0'
}
在 build.gradle 中:
plugins {
    // Apply the plugin. You can find the latest version at https://projects.neoforged.net/neoforged/ModDevGradle
    id 'net.neoforged.moddev' version '1.0.11'
}

neoForge {
    // We currently only support NeoForge versions later than 21.0.x
    // See https://projects.neoforged.net/neoforged/neoforge for the latest updates
    version = "21.0.103-beta"

    // Validate AT files and raise errors when they have invalid targets
    // This option is false by default, but turning it on is recommended
    validateAccessTransformers = true

    runs {
        client {
            client()
        }
        data {
            data()
        }
        server {
            server()
        }
    }

    mods {
        testproject {
            sourceSet sourceSets.main
        }
    }
}
示例代码可参见该测试项目。
Vanilla 模式
在多加载器(multi-loader)项目中,你常常需要一个子项目来存放跨加载器的通用代码。该项目同样需要访问 Minecraft 类,但不需要任何特定加载器的扩展。
本插件通过提供一种 “Vanilla 模式” 解决这一问题:你只需指定 NeoForm 版本 而非 NeoForge 版本即可启用。NeoForm 包含生成 Minecraft jar 文件所需的配置,你可以针对这些 不含任何其他修改的 jar 进行编译。
在 Vanilla 模式下,仅支持 client、server 和 data 三种运行类型。
由于此模式下插件不包含任何 Mod 加载器代码,游戏内只能使用基础的资源包与数据包。
在 build.gradle 中:
像往常一样应用插件,并使用如下配置块:
neoForge {
    // Look for versions on https://projects.neoforged.net/neoforged/neoform
    neoFormVersion = "1.21-20240613.152323"

    runs {
        client {
            client()
        }
        server {
            server()
        }
        data {
            data()
        }
    }
}
禁用反编译与重新编译
默认情况下,MDG 会使用 NeoForm 的反编译/重新编译流水线来生成 Minecraft 源码及配套的已编译游戏 jar。这带来出色的调试体验,但代价是更长的初始化时间。
自 MDG 2.0.124 起,可以改用另一条流水线,它会完全跳过反编译与重新编译。
自 MDG 2.0.136 起,若环境变量 CI 为 true,则在 CI/CD 流水线中默认启用该流水线。
在 GitHub Actions 等众多 CI/CD 系统中,该变量默认即为 true。
若要手动控制此设置,请将:
neoForge {
    version = "..." // or neoFormVersion = "..."
}
替换为:
neoForge {
    enable {
        version = "..." // or neoFormVersion = "..."
        disableRecompilation = true
    }
}
常见问题
查看 Minecraft 类时点击 “Attach Sources” 无反应(IntelliJ IDEA)
有时 IntelliJ 会进入一种状态:在查看反编译后的 Minecraft 类时,点击 “Attach Sources” 不起作用。
重新加载 Gradle 项目后再次点击 “Attach Sources”,通常即可解决该问题。
找不到任务 idePostSync(IntelliJ IDEA)
从另一个带有 idePostSync 任务的插件切换到 ModDevGradle 时,通常会出现此错误。
可以在 IntelliJ IDEA 中注销该任务来修复,步骤如下:
点击展开
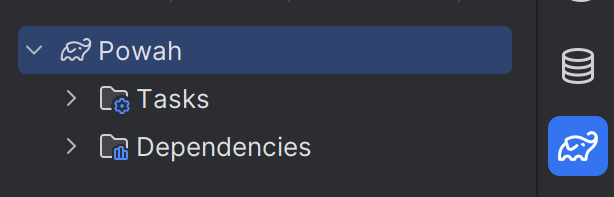
- 打开右侧的 Gradle 工具窗口,右键点击该 Gradle 项目。
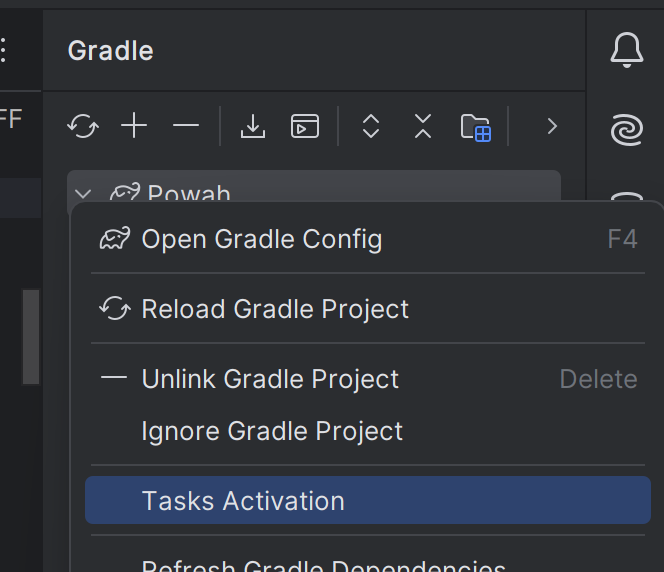
- 点击
Tasks Activation。
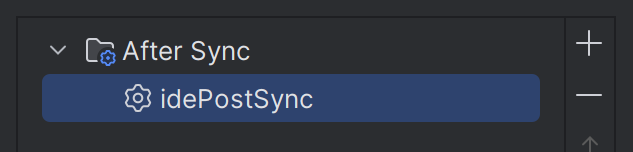
- 选中
idePostSync任务,用-按钮将其删除。
- 再次同步 Gradle 项目。
更多配置
运行配置
在 neoForge { runs { ... } } 块中可以添加任意数量的运行配置。
每个运行配置都必须有一个类型。目前支持的类型为 client、data、gameTestServer、server。
运行类型的设置方式如下:
neoForge {
    runs {
        <run name> {
            // This is the standard syntax:
            type = "gameTestServer"
            // Client, data and server runs can use a shorthand instead:
            // client()
            // data()
            // server()

            // Changes the working directory used for this run.
            // The default is the 'run' subdirectory of your project
            gameDirectory = project.file('runs/client')

            // Add arguments passed to the main method
            programArguments = ["--arg"]
            programArgument("--arg")

            // Add arguments passed to the JVM
            jvmArguments = ["-XX:+AllowEnhancedClassRedefinition"]
            jvmArgument("-XX:+AllowEnhancedClassRedefinition")

            // Add system properties
            systemProperties = [
                    "a.b.c": "xyz"
            ]
            systemProperty("a.b.c", "xyz")

            // Set or add environment variables
            environment = [
                    "FOO_BAR": "123"
            ]
            environment("FOO_BAR", "123")

            // Optionally set the log-level used by the game
            logLevel = org.slf4j.event.Level.DEBUG

            // You can change the name used for this run in your IDE
            ideName = "Run Game Tests"

            // You can disable a run configuration being generated for your IDE
            disableIdeRun()
            // ... alternatively you can set ideName = ""

            // Changes the source set whose runtime classpath is used for this run. This defaults to "main"
            // Eclipse does not support having multiple runtime classpaths per project (except for unit tests).
            sourceSet = sourceSets.main

            // Changes which local mods are loaded in this run.
            // This defaults to all mods declared in this project (inside of mods { ... } ).
            loadedMods = [mods.<mod name 1>, mods.<mod name 2>]

            // Allows advanced users to run additional Gradle tasks before each launch of this run
            // Please note that using this feature will significantly slow down launching the game
            taskBefore tasks.named("generateSomeCodeTask")
        }
    }
}
支持的属性列表请参阅 RunModel.java。 下面这个示例通过设置系统属性把日志级别改为 debug:
neoForge {
    runs {
        configureEach {
            systemProperty 'forge.logging.console.level', 'debug'
        }
    }
}
Jar-in-Jar
若要把外部 Jar 文件嵌入你的 Mod 文件,可以使用插件提供的 jarJar 配置。
外部依赖
当你想打包外部依赖时,Jar-in-Jar 必须能够在该依赖被多个 Mod(甚至可能是不同版本) 打包时选出单一副本。为支持这一场景,你应当设置一个受支持的版本范围,以避免 Mod 之间不兼容。
dependencies {
    jarJar(implementation("org.commonmark:commonmark")) {
        version {
            // The version range your mod is actually compatible with.
            // Note that you may receive a *lower* version than your preferred if another
            // Mod is only compatible up to 1.7.24, for example, your mod might get 1.7.24 at runtime.
            strictly '[0.1, 1.0)'
            prefer '0.21.0' // The version actually used in your dev workspace
        }
    }
}
版本范围采用 Maven 版本范围格式:
| 范围 | 含义 |
|---|---|
| (,1.0] | x <= 1.0 |
| 1.0 | 对 1.0 的软要求,允许任意版本。 |
| [1.0] | 对 1.0 的硬要求 |
| [1.2,1.3] | 1.2 <= x <= 1.3 |
| [1.0,2.0) | 1.0 <= x < 2.0 |
| [1.5,) | x >= 1.5 |
| (,1.0],[1.2,) | x <= 1.0 或 x >= 1.2。多个区间以逗号分隔 |
| (,1.1),(1.1,) | 若已知 1.1 与此库配合无法工作,则排除 1.1 |
本地文件
你也可以包含项目中其他任务构建出的文件,例如其他源集(source set)的 jar 任务产物。
当你想为某个核心 Mod(coremod)或插件构建一个附加 jar 时,可以定义一个独立的源集 plugin,
为其添加一个打包用的 jar 任务,然后像下面这样包含该 jar 的输出:
sourceSets {
    plugin
}


neoForge {
    // ...
    mods {
        // ...
        // To make the plugin load in dev
        'plugin' {
            sourceSet sourceSets.plugin
        }
    }
}

def pluginJar = tasks.register("pluginJar", Jar) {
    from(sourceSets.plugin.output)
    archiveClassifier = "plugin"
    manifest {
        attributes(
                'FMLModType': "LIBRARY",
                "Automatic-Module-Name": project.name + "-plugin"
        )
    }
}

dependencies {
    jarJar files(pluginJar)
}
以这种方式包含 jar 文件时,我们会以其文件名作为 artifact-id、以其 MD5 哈希作为版本号。 它绝不会被同名的嵌入库替换,除非二者内容完全一致。
子项目
例如,如果你在某个子项目中有一个核心 Mod(coremod)并想嵌入其 jar 文件,可以使用如下语法。
dependencies {
    jarJar project(":coremod")
}
启动游戏时,FML 会使用嵌入 Jar 文件的 group 与 artifact id 来判断其他 Mod 中是否嵌入了同一文件。 对子项目而言,group id 为根项目名,而 artifact id 为子项目名。 除了 group 与 artifact id,嵌入 Jar 的 Java 模块名在所有已加载的 Jar 文件中也必须唯一。 为在未显式设置模块名时降低冲突的可能性, 我们会用 group id 作为前缀加在嵌入子项目的文件名之前。
外部依赖:运行配置
自 Minecraft 1.21.9 起,外部依赖无需再做特殊处理即可在运行配置中加载。
查看 Minecraft 1.21.8 及更早版本的相关信息
只有当外部依赖本身是 Mod(带有 META-INF/neoforge.mods.toml 文件),
或其 META-INF/MANIFEST.MF 文件中设置了 FMLModType 条目时,它们才会在运行配置中被加载。
通常,Java 库并不满足这两项要求之一,
因此当你尝试从 Mod 中调用它们时,运行时会抛出 ClassNotFoundException。
要解决此问题,需要把该库添加到 additionalRuntimeClasspath,方法如下:
dependencies {
    // This is still required to add the library in your jar and at compile time.
    jarJar(implementation("org.commonmark:commonmark")) { /* ... */ }
    // This adds the library to all the runs.
    additionalRuntimeClasspath "org.commonmark:commonmark:0.21.0"
}
进阶:附加运行时类路径可以按运行配置分别设置。
例如,若只想为 client 运行配置添加某个依赖,可将其添加到 clientAdditionalRuntimeClasspath。
隔离的源集
如果你使用的源集不继承自 main,并希望 modding 相关依赖在这些源集中也可用,
可以使用以下 API:
sourceSets {
  anotherSourceSet // example
}

neoForge {
  // ...
  addModdingDependenciesTo sourceSets.anotherSourceSet

  mods {
    mymod {
      sourceSet sourceSets.main
      // Do not forget to add additional source-sets here!
      sourceSet sourceSets.anotherSourceSet
    }
  }
}

dependencies {
  implementation sourceSets.anotherSourceSet.output
}
更好的 Minecraft 参数名 / Javadoc(Parchment)
你可以为 Minecraft 源码使用由社区贡献的参数名与 Javadoc, 来源为 ParchmentMC。
最简单的方式是在 gradle.properties 中设置 Parchment 版本:
neoForge.parchment.minecraftVersion=1.21
neoForge.parchment.mappingsVersion=2024.06.23
或者,你也可以在 build.gradle 中设置:
neoForge {
    // [...]

    parchment {
        // Get versions from https://parchmentmc.org/docs/getting-started
        // Omit the "v"-prefix in mappingsVersion
        minecraftVersion = "1.20.6"
        mappingsVersion = "2024.05.01"
    }
}
使用 JUnit 进行单元测试
除游戏测试(GameTest)外,本插件还支持使用 JUnit 对 Mod 进行单元测试。
做最简配置时,将以下代码添加到构建脚本中:
// Add a test dependency on the test engine JUnit
dependencies {
    testImplementation 'org.junit.jupiter:junit-jupiter:5.7.1'
    testRuntimeOnly 'org.junit.platform:junit-platform-launcher'
}

// Enable JUnit in Gradle:
test {
    useJUnitPlatform()
}

neoForge {
    unitTest {
        // Enable JUnit support in the moddev plugin
        enable()
        // Configure which mod is being tested.
        // This allows NeoForge to load the test/ classes and resources as belonging to the mod.
        testedMod = mods.<mod name > // <mod name> must match the name in the mods { } block.
        // Configure which mods are loaded in the test environment, if the default (all declared mods) is not appropriate.
        // This must contain testedMod, and can include other mods as well.
        // loadedMods = [mods.<mod name >, mods.<mod name 2>]
    }
}
现在你可以在 test/ 文件夹中为单元测试使用 @Test 注解,
并引用 Minecraft 类。
加载服务端
借助 NeoForge 测试框架,你可以在 Minecraft 服务端的上下文中运行单元测试:
dependencies {
    testImplementation "net.neoforged:testframework:<neoforge version>"
}
有了这个依赖,你可以像下面这样为测试类添加注解:
@ExtendWith(EphemeralTestServerProvider.class)
public class TestClass {
    @Test
    public void testMethod(MinecraftServer server) {
        // Use server...
    }
}
集中式仓库声明
本插件支持在 settings.gradle 中使用
Gradle 的集中式仓库声明,
它提供了一个单独的插件,用于应用开发 Mod 所需的仓库。
在 settings.gradle 中可按如下方式使用:
plugins {
    id 'net.neoforged.moddev.repositories' version '<version>'
}

dependencyResolutionManagement {
    repositories {
        mavenCentral()
    }
}
请注意,在 build.gradle 中定义任何仓库都会完全禁用该项目的集中式仓库管理。 你也可以在项目中使用 repositories 插件来添加仓库, 即使依赖管理已被覆盖也仍然可行。
访问转换器(Access Transformer)
访问转换器(Access Transformer)是一项进阶特性,允许 Mod 放宽 Minecraft 类、 字段和方法的访问修饰符。
要使用此特性,你可以在 src/main/resources/META-INF/accesstransformer.cfg 放置一个访问转换器数据文件,
其内容需遵循访问转换器格式。
当你使用默认文件位置时,无需进行任何配置。
如果你想使用额外的或不同的访问转换器文件,可以通过设置 accessTransformers 属性来修改 MDG 读取它们的路径。
如果你不使用默认路径,还必须相应地修改 neoforge.mods.toml 并配置这些路径。 详情请参阅 NeoForge 文档。
这些元素的格式与 project.files(...) 所期望的一致。
neoForge {
    // Pulling in an access transformer from the parent project
    // (Option 1) Add a single access transformer, and keep the default:
    accessTransformers.from "../src/main/resources/META-INF/accesstransformer.cfg"
    // (Option 2) Overwrite the whole list of access transformers, removing the default:
    accessTransformers = ["../src/main/resources/META-INF/accesstransformer.cfg"]
}
此外,你还可以在 dependencies 块中使用普通的 Project 依赖语法,向 accessTransformers 配置添加额外的访问转换器。
发布访问转换器
你可以选择把访问转换器发布到 Maven 仓库,以便其他 Mod 使用。
要发布访问转换器,按如下方式添加 publish 声明:
neoForge {
    accessTransformers {
        publish file("src/main/resources/META-INF/accesstransformer.cfg")
    }
}
如果只有一个访问转换器,它将以 accesstransformer 分类符(classifier)发布。
如果有多个,它们将以 accesstransformer1、accesstransformer2 等分类符发布。
要引用某个访问转换器,将其作为 accessTransformers 依赖添加。
这会找到所有已发布的访问转换器,无论其文件名如何。
例如:
dependencies {
    accessTransformers "<group>:<artifact>:<version>"
}
接口注入
接口注入是一项进阶特性,允许 Mod 在开发阶段为 Minecraft 的类和接口添加额外接口。 此特性要求 Mod 使用 ASM 或 Mixin 在运行时做出相同的扩展。
要使用此特性,请在项目中放置一个接口注入数据文件,并配置 interfaceInjectionData 属性将其纳入。
由于此特性仅在开发阶段生效,你无需将该数据文件包含进 jar 中。
此特性仅在开发阶段生效。要使其在运行时生效,你需要使用 Mixin 或 Coremod。
build.gradle
neoForge {
    interfaceInjectionData.from "interfaces.json"
}
interfaces.json
{
  "net/minecraft/world/item/ItemStack": [
    "testproject/FunExtensions"
  ]
}
此外,你还可以在 dependencies 块中使用普通的 Project 依赖语法,向 interfaceInjectionData 配置添加额外的数据文件。
发布接口注入数据
接口注入数据的发布遵循与访问转换器发布相同的原则。
如果只有一个数据文件,它将以 interfaceinjection 分类符发布。
如果有多个,它们将以 interfaceinjection1、interfaceinjection2 等分类符发布。
// Publish a file:
neoForge {
    interfaceInjectionData {
        publish file("interfaces.json")
    }
}
// Consume it:
dependencies {
    interfaceInjectionData "<group>:<artifact>:<version>"
}
使用已认证的 Minecraft 账号
在开发环境中,Minecraft 运行配置通常使用离线用户档案。
如果你想用真实用户档案运行游戏,可以借助 DevLogin,
把某个客户端运行配置的 devLogin 属性设为 true:
neoForge {
    runs {
        // Add a second client run that is authenticated
        clientAuth {
            client()
            devLogin = true
        }
    }
}
首次启动已认证的运行配置时,控制台会提示你访问 https://www.microsoft.com/link 并输入 所给出的代码。更多信息见 DevLogin readme。
进阶技巧
覆盖平台库
在开发 NeoForge 及其各种平台库的过程中进行测试时,把版本全局覆盖为某个未发布的版本会很有用。 下面这种写法可行:
configurations.all {
    resolutionStrategy {
        force 'cpw.mods:securejarhandler:2.1.43'
    }
}
请求额外的 Minecraft 构件
用于生成 Minecraft jar 的 NeoForm 过程会产生一些额外的中间结果,这些结果在进阶构建脚本中可能有用。
你可以通过 additionalMinecraftArtifacts 属性,请求把这些结果写入指定的输出文件。
具体有哪些结果可用,取决于所使用的 NeoForm/NeoForge 和 NFRT 版本。(固定 NFRT 版本的方法见下文。)
neoForge {
    // Request NFRT to write additional results to the given locations
    // This happens alongside the creation of the normal Minecraft jar
    additionalMinecraftArtifacts.put('vanillaDeobfuscated', project.file('vanilla.jar'))
}
NFRT 全局设置
neoFormRuntime {
    // Use a specific NFRT version
    // Gradle Property: neoForge.neoFormRuntime.version
    version = "1.2.3"

    // Control use of cache
    // Gradle Property: neoForge.neoFormRuntime.enableCache
    enableCache = false

    // Enable Verbose Output
    // Gradle Property: neoForge.neoFormRuntime.verbose
    verbose = true

    // Use Eclipse Compiler for Minecraft
    // Gradle Property: neoForge.neoFormRuntime.useEclipseCompiler
    useEclipseCompiler = true

    // Print more information when NFRT cannot use a cached result
    // Gradle Property: neoForge.neoFormRuntime.analyzeCacheMisses
    analyzeCacheMisses = true

    // Overrides the launcher manifest URL used by NFRT to look up Minecraft versions
    // Gradle Property: neoForge.neoFormRuntime.launcherManifestUrl
    launcherManifestUrl = "https://.../version_manifest_v2.json"
}
在 IDE 项目同步时运行任务
你可以添加在 IDE 重新加载 Gradle 项目时运行的任务。 进阶用户可能会觉得这很有用,例如在 IDE 每次同步项目时运行代码生成任务。
neoForge {
    ideSyncTask tasks.named("generateSomeCodeTask")
}